Writing Content
How to create, edit, review, and publish articles in Eclipse.
Writing Content
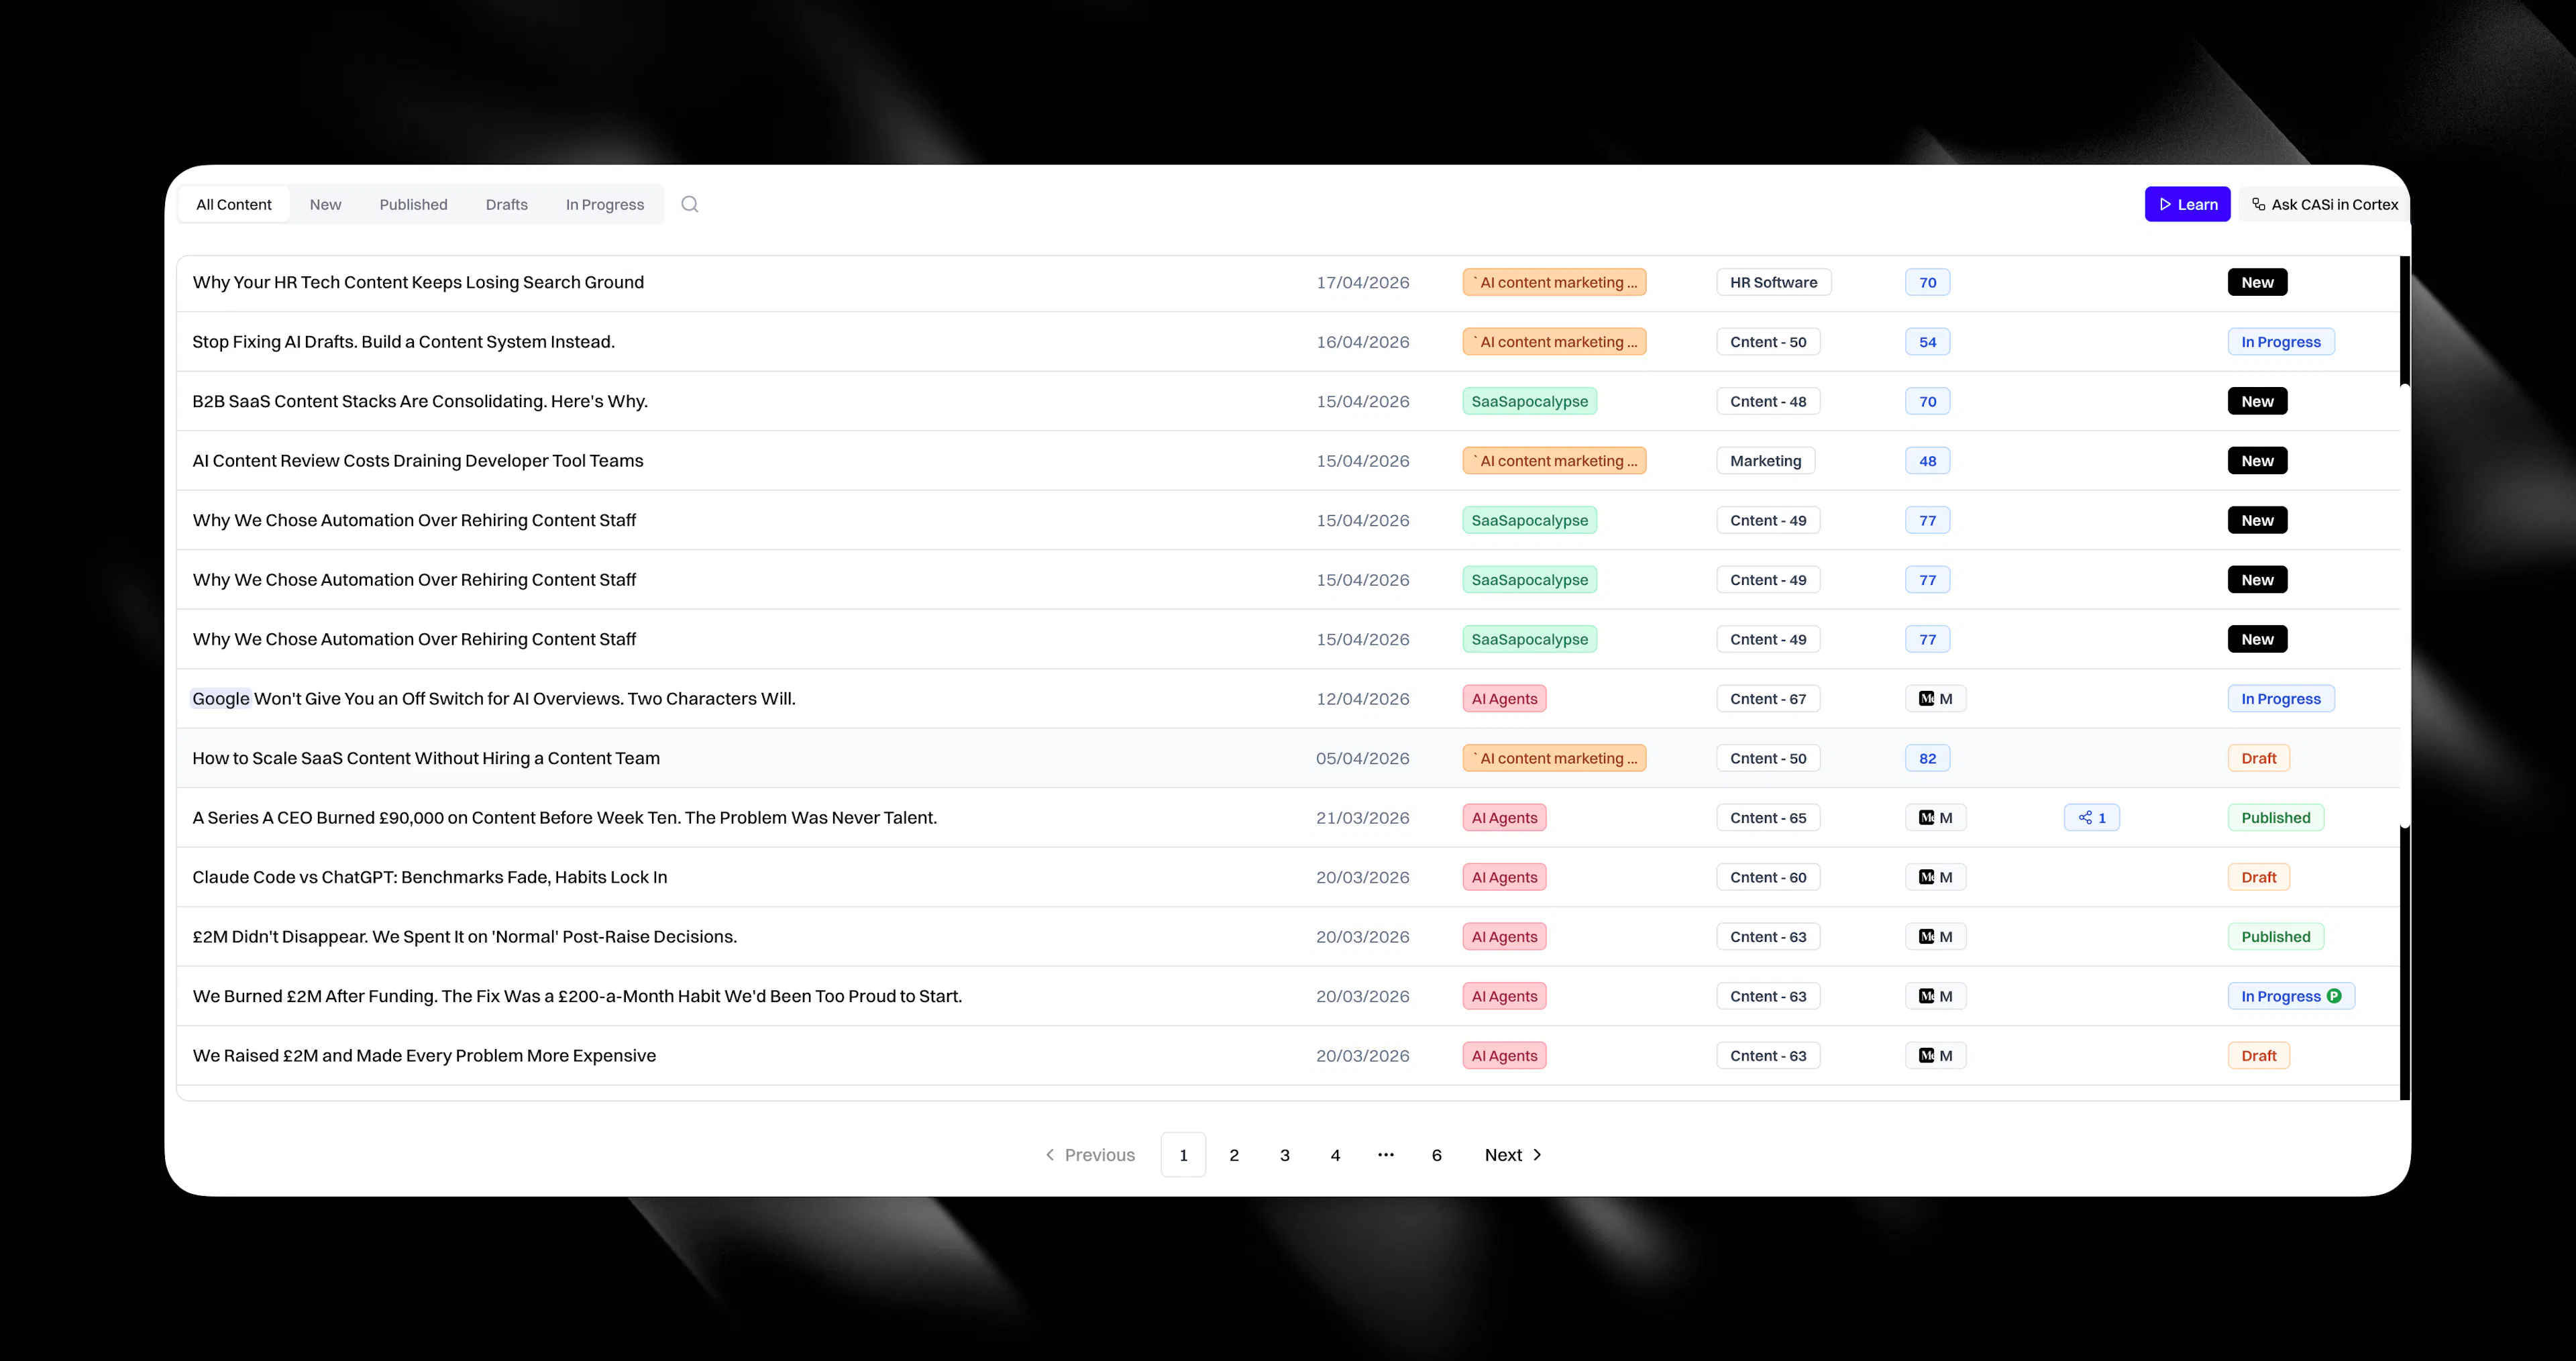
The Content page is your article command centre. Every article you create, whether from the Content page, Navigation Search, or Cortex Canvas, ends up here. You can filter by status, open any article in the editor, and publish directly to your CMS.
The content table
Your content table shows all articles for the active client. Each row displays the article title, its Content Profile, status, and creation date. Filter by tab to see what needs attention:
-
All shows everything.
-
New shows freshly generated articles waiting for their first review.
-
In Progress shows articles you've opened and started editing.
-
Draft shows articles saved but not yet published.
-
Published shows articles that have gone live on your CMS.
Creating an article
There are three routes to a new article.
From the Content page, click Create Article. Choose a Content Profile and Eclipse handles the rest. It researches your market, pulls in external sources and competitor data, and generates a fully cited draft. The article appears in your content table ready for review.
From Navigation Search, open the sidebar search or press Cmd+K on macOS and Ctrl+K on Windows or Linux, then choose Create Article. Pick a published Content Profile and click Generate Article. This is the fastest route when you already know which profile should produce the next draft. See Navigation Search for shortcuts and controls.
From Cortex Canvas, build your research first. Connect workspace documents, run deep research, pull in community threads, then click Create content (the button with the pad and pencil) on the canvas toolbar. You can apply a Content Profile or send your entire canvas research straight to CASi. The finished article lands in your content table, grounded in the evidence you assembled. See Create from Canvas for the full panel walkthrough.
The editor
Click any article in the content table to open it in the editor. The draft arrives fully cited and referenced.
Inline editing. Click anywhere in the article and type. Your changes are saved automatically.
CASi rewrites. Highlight any section you want rewritten and instruct CASi. It rewrites that section while leaving the rest of the article untouched. Your approved copy, citations, and structure stay put.
Justification view. For standard articles, switch to justification view to inspect why a title, claim, citation, structural choice, positioning decision, or brand-language choice was made. The view links each decision back to the source material behind it, so you can verify before you approve.
Ask CASi in justification view. If you want a fuller explanation of a decision, use Ask CASi inside the justification panel.
Medium article types use a different scoring model, so they do not show the same E-E-A-T justifications as standard articles.
For the full workflow, see Justifications.
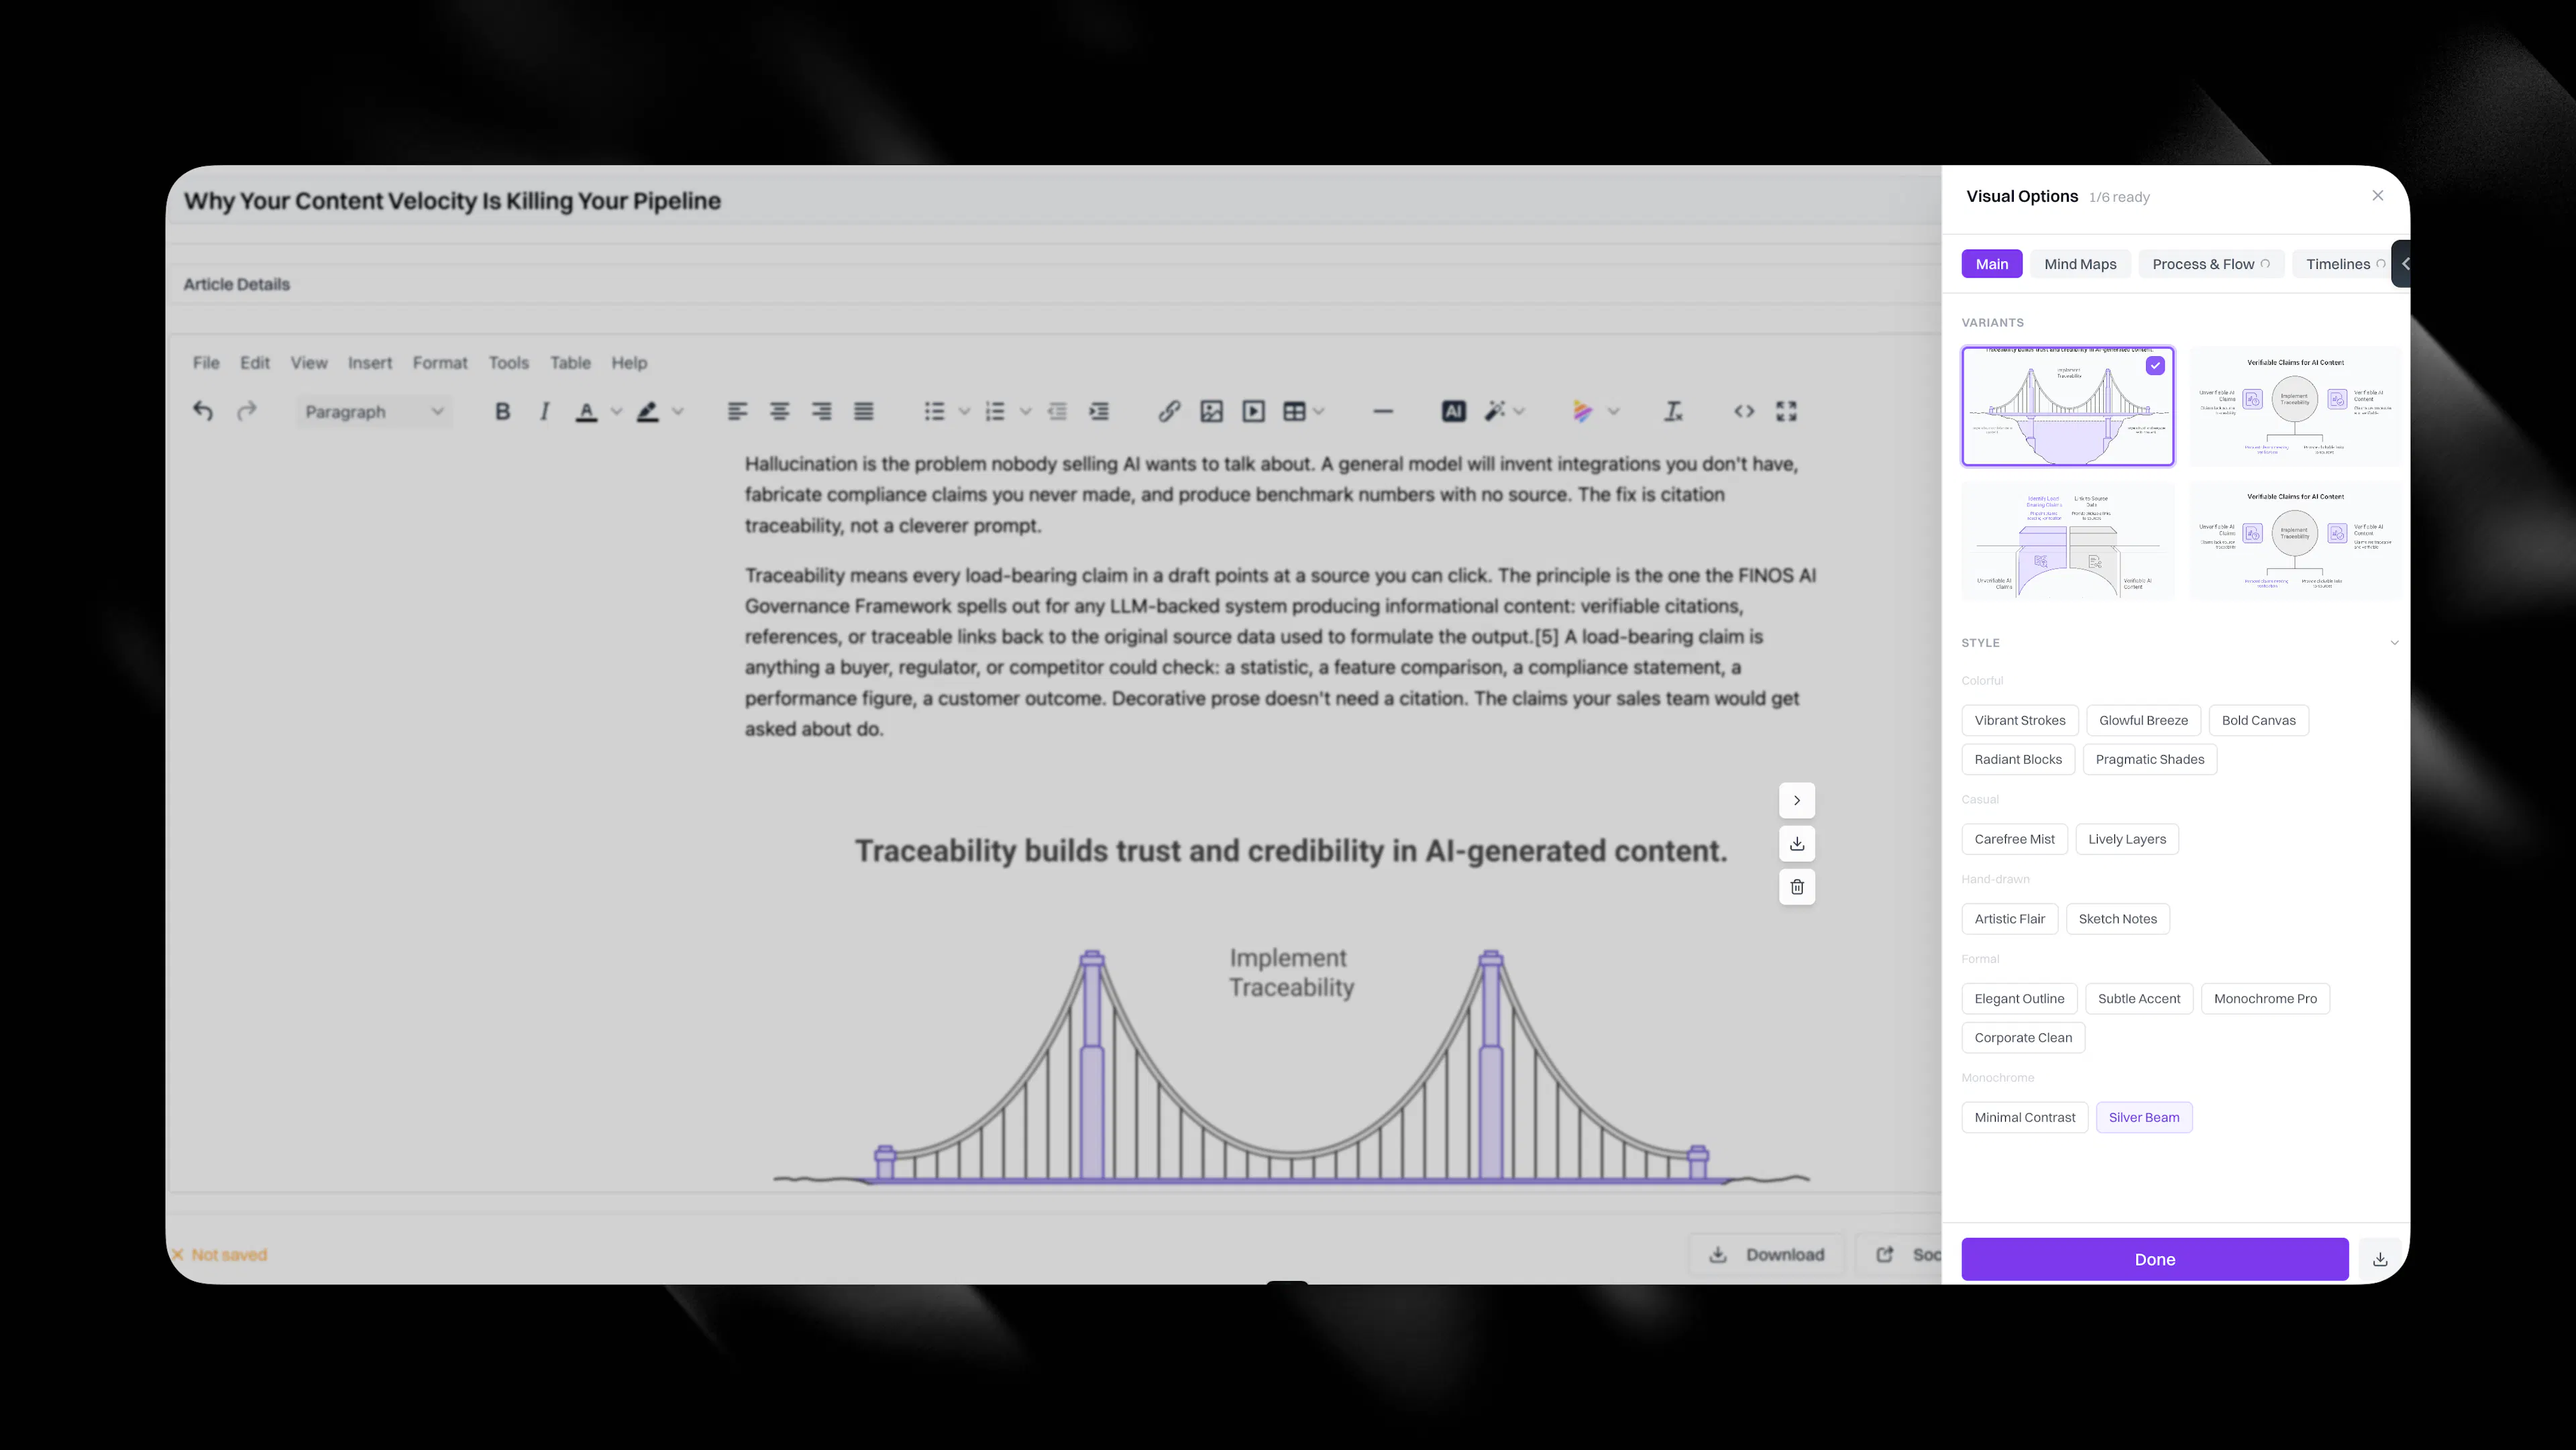
Napkin Visuals (Napkin AI). Highlight text in the editor, or click the Napkin icon in the toolbar. Eclipse scans the selection and shows a small Napkin icon next to the recommended wording.
Click the Napkin icon to generate a visual, which is inserted beneath the selected text. After generation, hover over the image to open a sliding panel on the right.
In that panel, you can iterate through variants:
-
Visual styles: four options.
-
Categories (for example, mind map, process): each category offers four options.
At the bottom of the panel you choose how to brand the next generation:
-
Custom brand: shown when you have configured a Napkin brand ID in Settings (under the Napkin section). Selecting it restarts generation so the visual is regenerated using your custom brand.
-
Napkin defaults: shown when no custom brand is configured. You get multiple preset varieties (around 13). Selecting a preset restarts generation so you can keep iterating.
For branding setup details, see Napkin AI.
You can also generate images on the Cortex Canvas using the image generation node and attach up to two of those images to an article. Canvas images are attached with image and alt tags included.
Status tracking. The article status updates as you work. When you save edits, it moves to In Progress automatically.
Publishing
When you're satisfied with the article, hit Publish. Eclipse shows only the CMS platforms you've already connected through the Integrations page. If you've connected one CMS, that's what you'll see. If you've connected several, you pick which one to publish to.
Depending on your CMS, you may also choose where within it the article lands. For example, Contentful lets you select a space or environment. Webflow lets you choose which CMS collection. These options are configured when you set up the integration, where you map Eclipse's fields to your CMS fields (auto-mapping is available alongside manual mapping). See the relevant integration page for setup details.
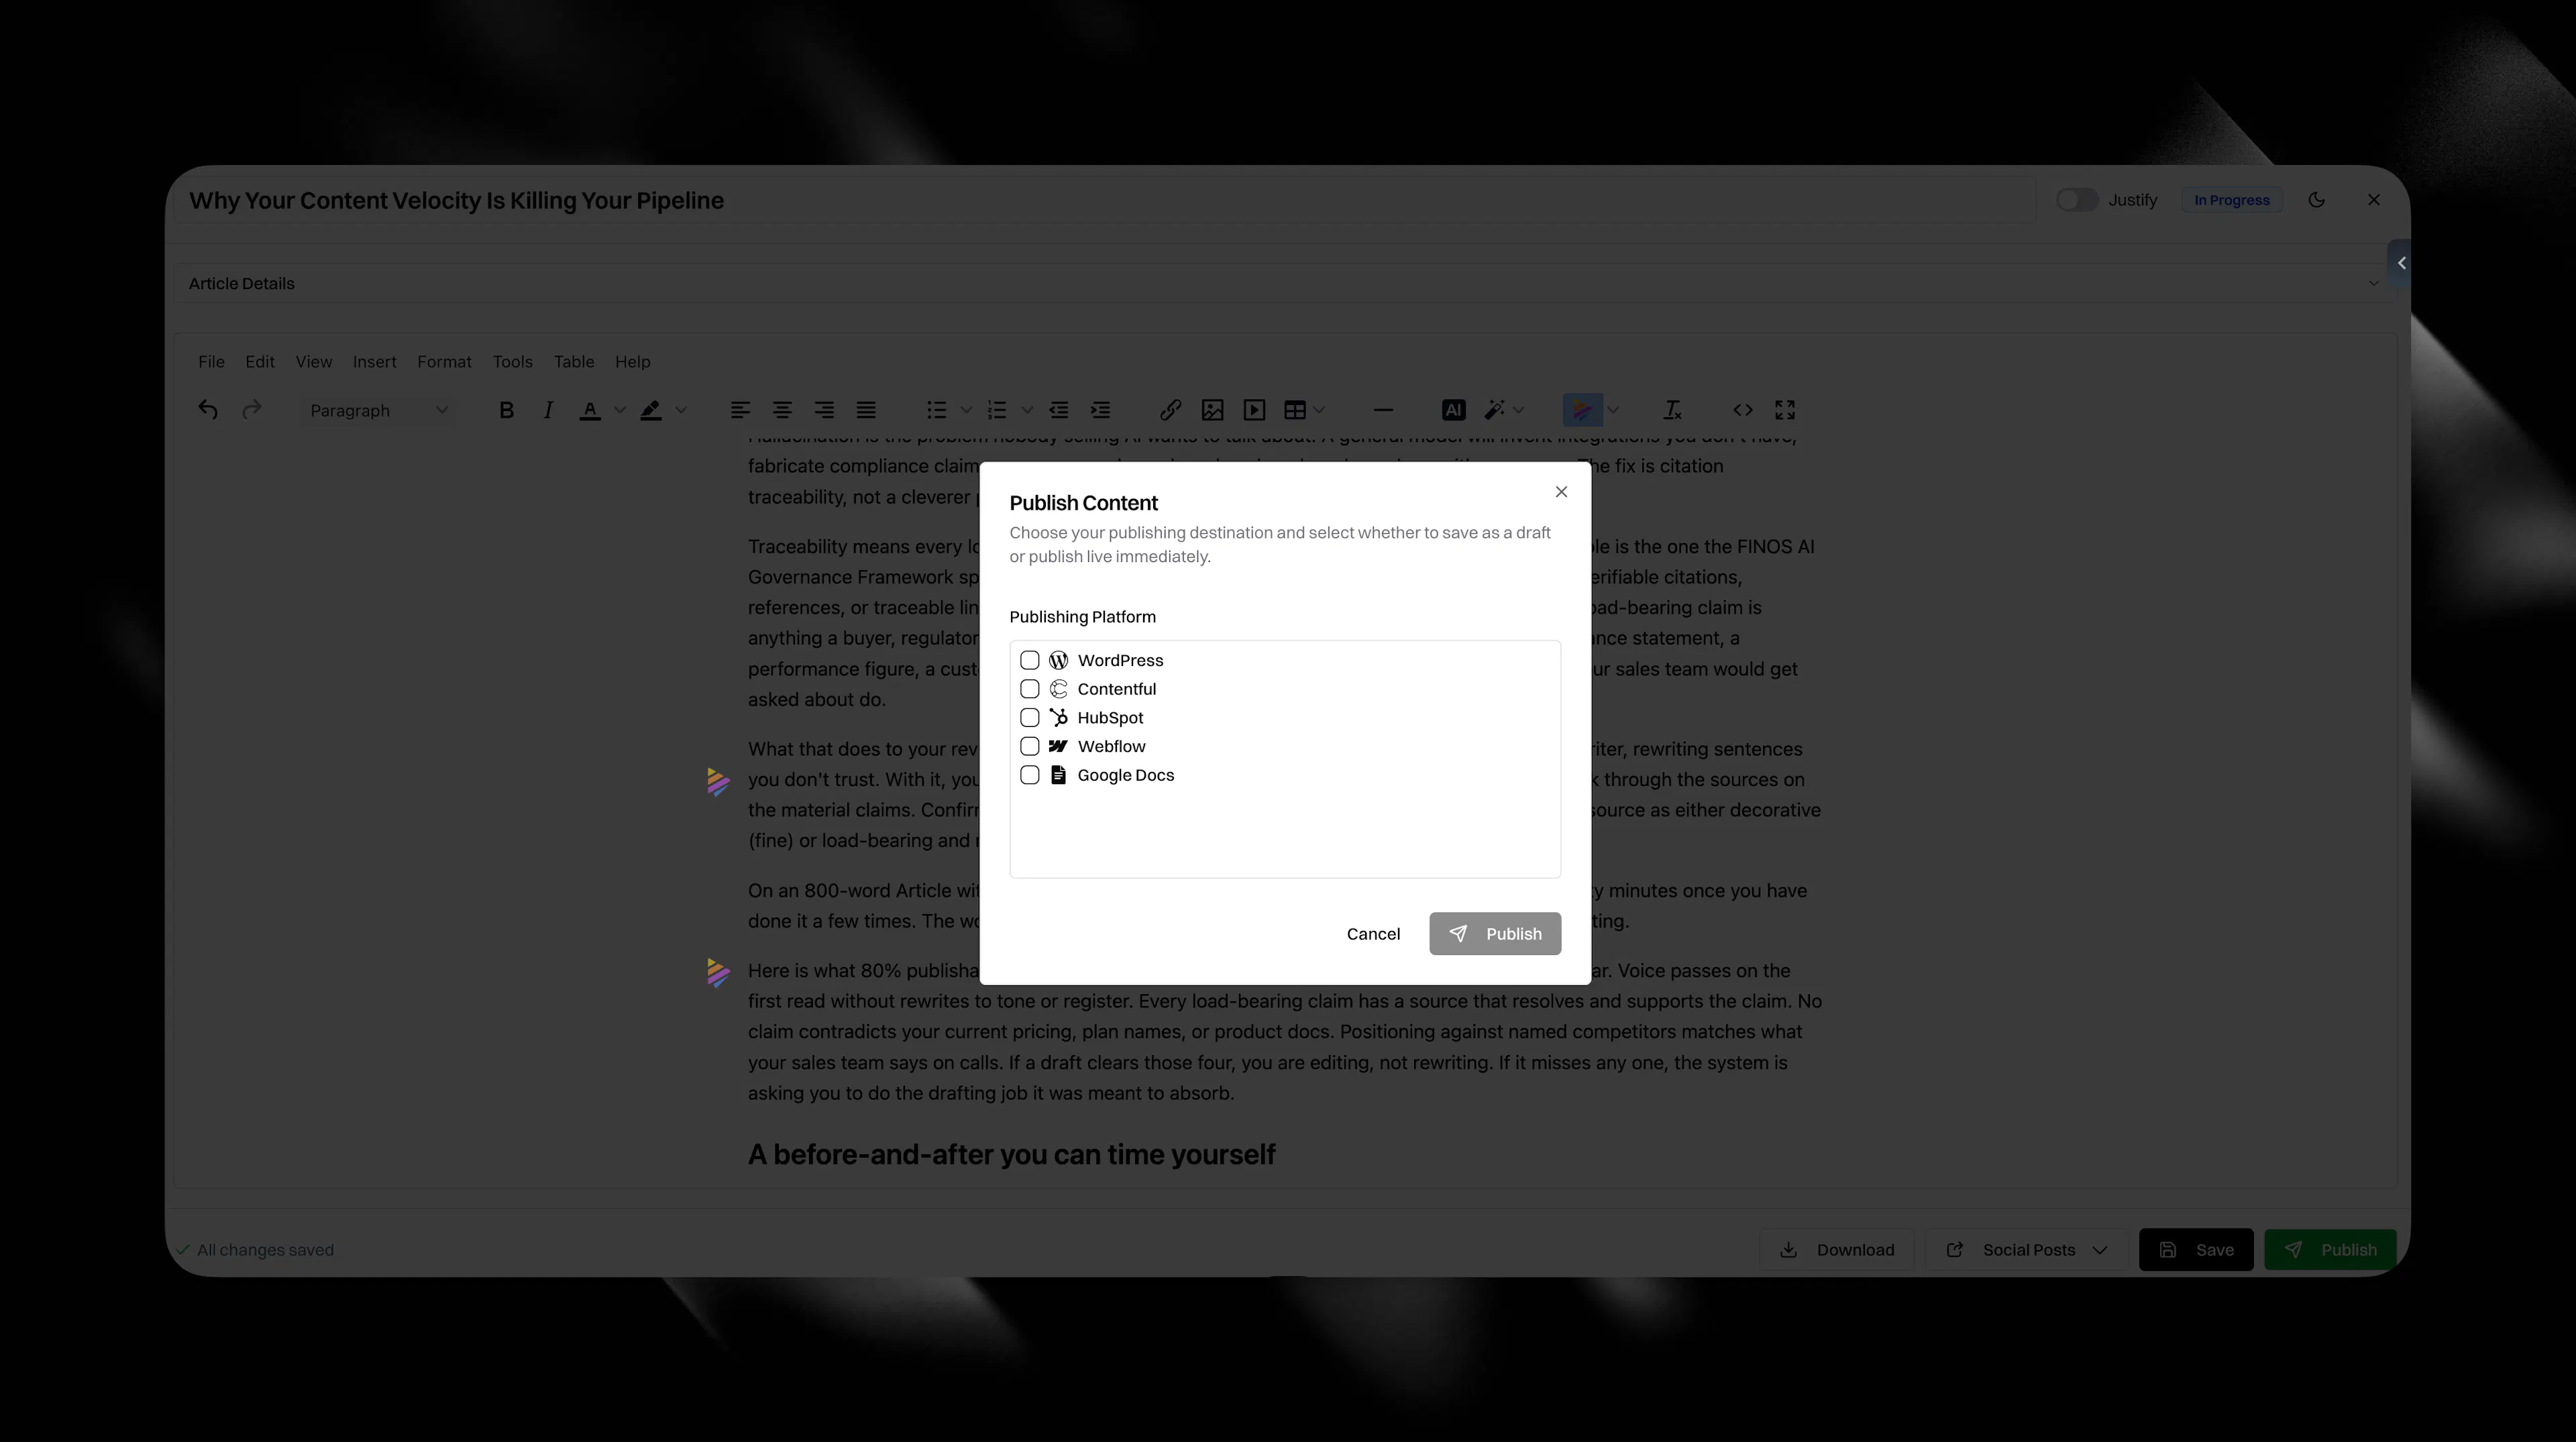
Formatting, headers, schema, and images are preserved across all seven destinations.
Nothing publishes without your approval. The publish button is the last gate between the draft and your live site.
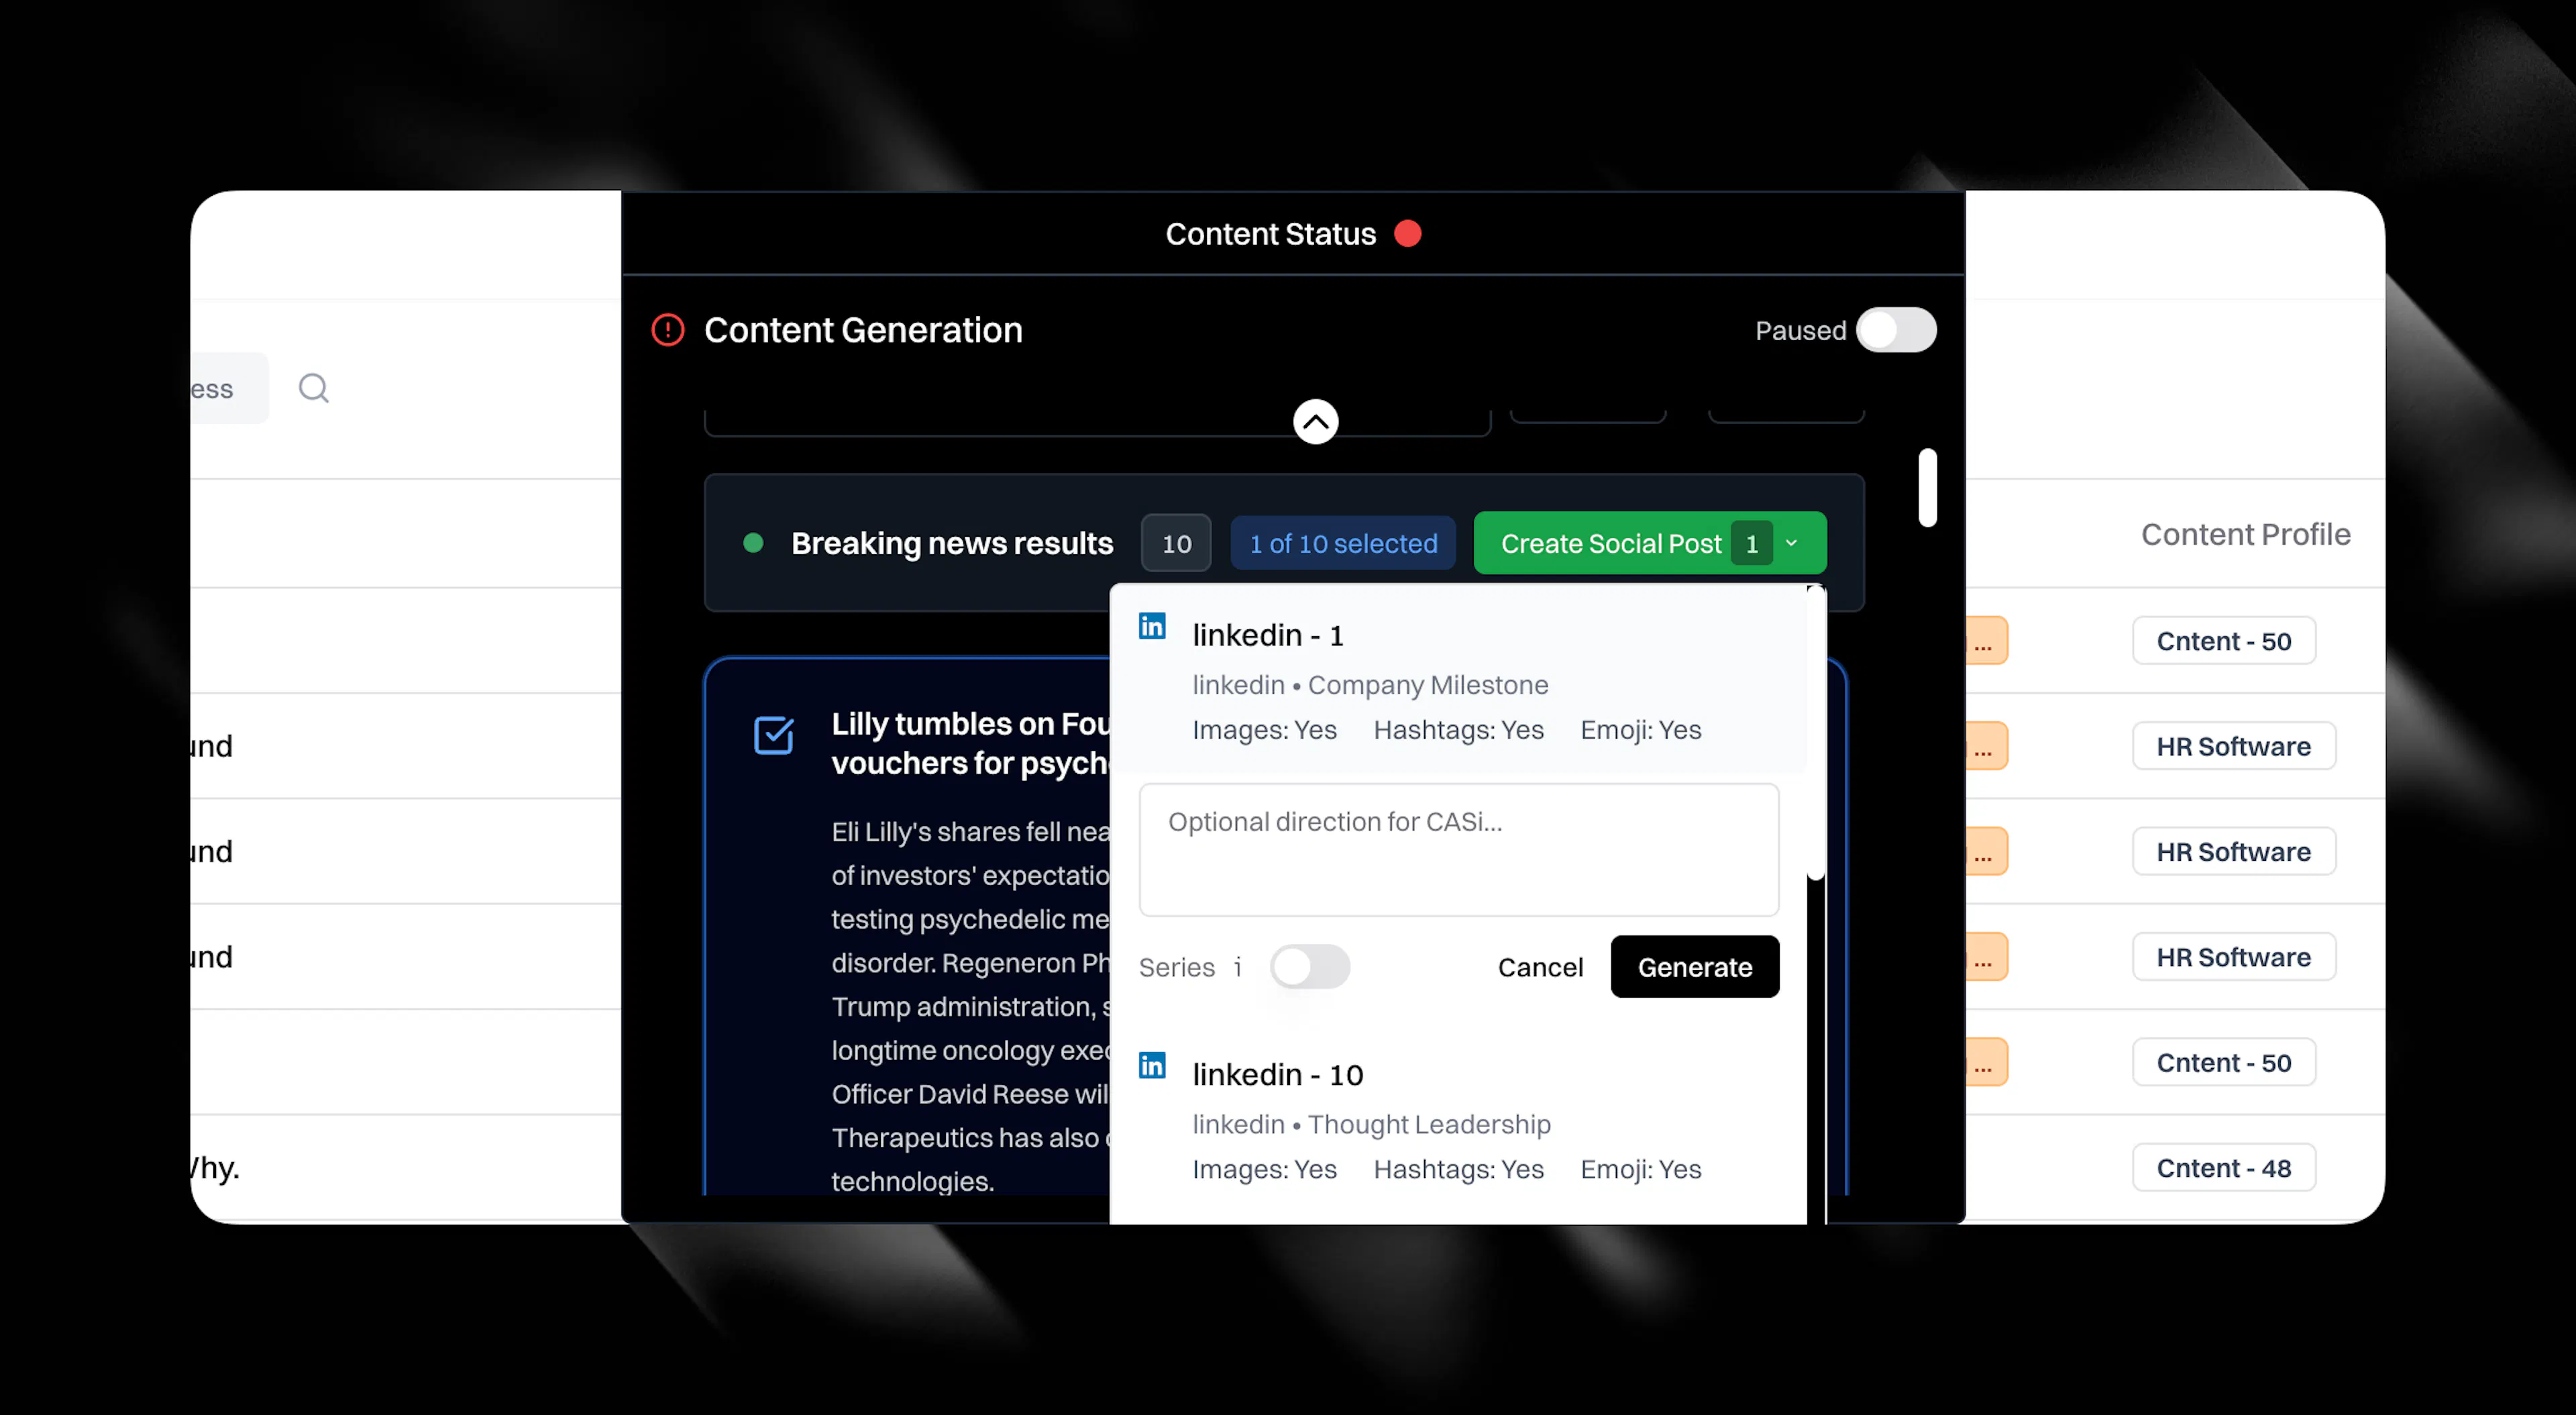
Social posts from articles
You can generate social media posts directly from any article in your content table. Click the Social Posts button in the editor, choose a Social Profile, optionally add specific direction for CASi in the directions box, then click Generate. Eclipse drafts posts grounded in the cited sources and brand voice from the article, based on your Social Profiles.
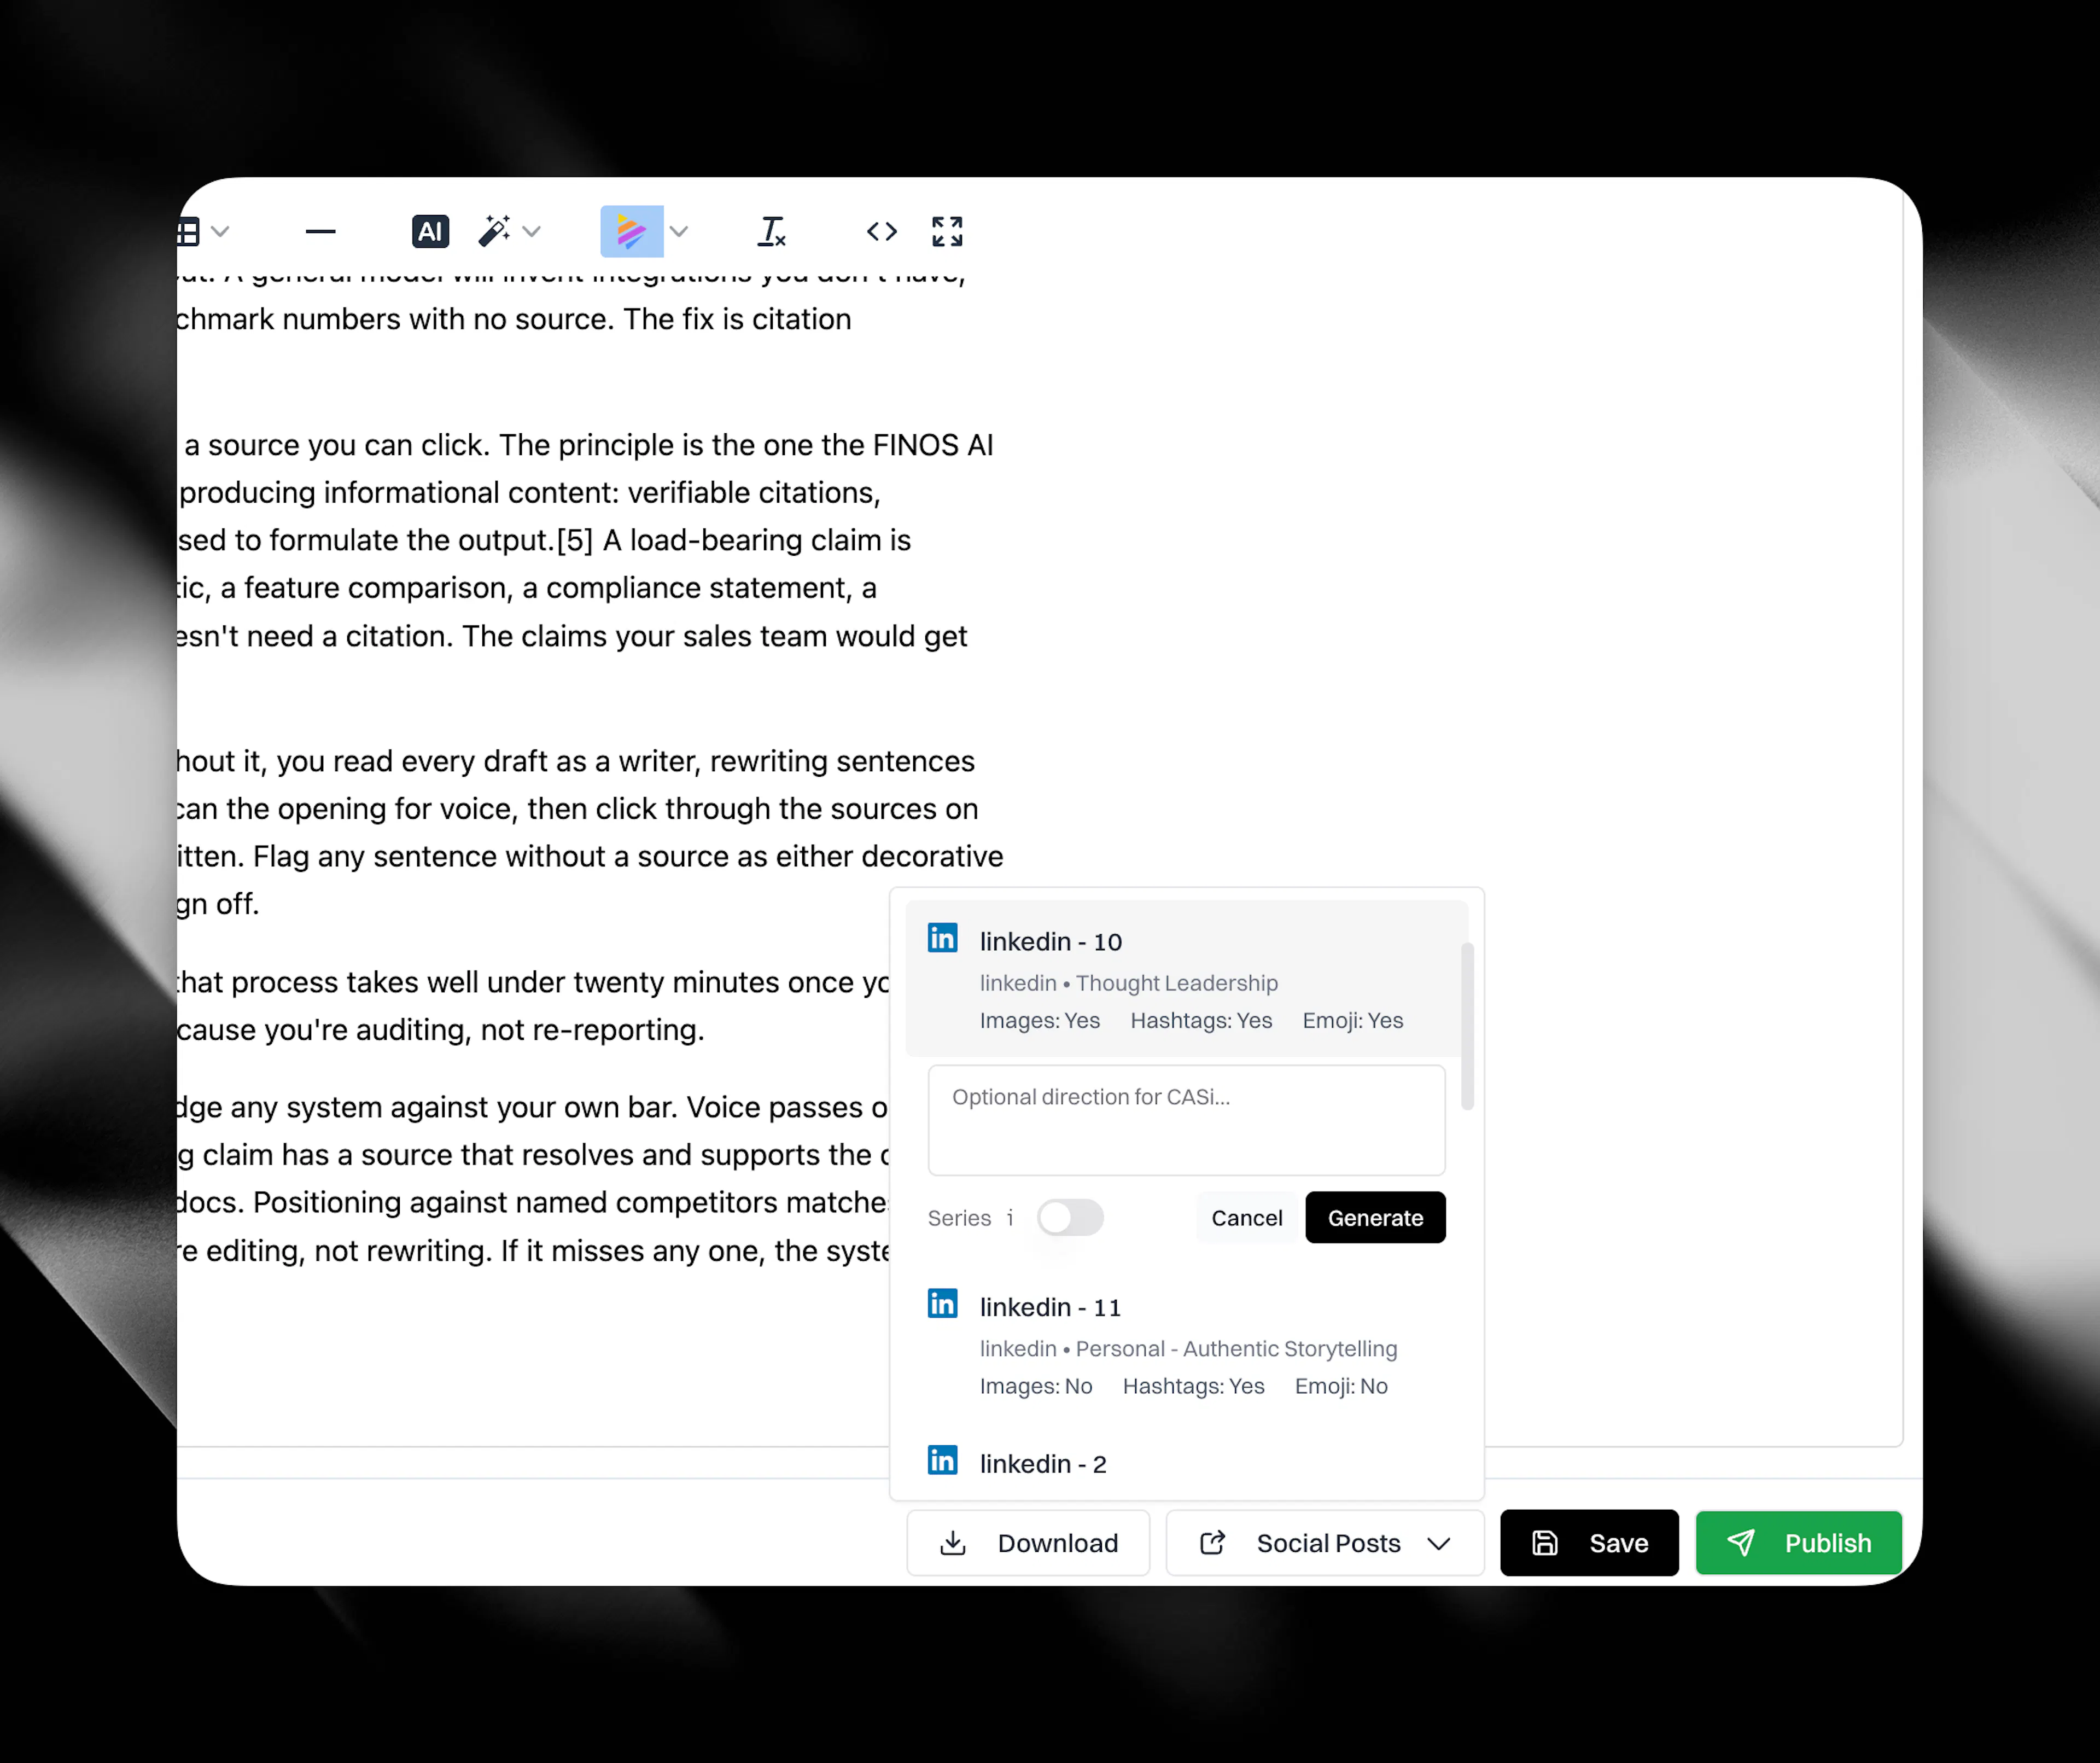
Each post takes ten to twenty minutes and lands in your social media table. Eclipse emails you when each post is ready, and posts an alert to your configured social alerts channel under the Slack integration.
You can also generate social posts from breaking news via the dynamic island at the top of the screen. See Social Content for the full details.